And The Beat Goes On….

•February 16, 2013 • Leave a Comment

Pine Street Head

Well…. I apologize for the absence, but I’ve been a busy Boy lately.  After I developed the new Pine Street model, and fretted over it’s release and delivery,   I received a request for the same amp, in Tweed, and in a head, and with multiple speaker outs and…….   Being amenable to special requests, I said “No Problemo”.  Only thing was, there was a problem.  The chassis is was using wasn’t really workable as a head, it was made to hang vertically, with the tubes hanging down.  So I need a different sized chassis.  Once I found a chassis size that would work with what I needed, the circuit board I used wouldn’t fit, and I would have to redesign the layout.  That’s ok!  I had some issues with parasitics in the trem circuit and wanted to redo the layout for that.  Then, then, then….

What I thought was going to be a no brainer and quick, turned into a complete redesign of the amp, physically and electrically.  What resulted, was a better sounding amp with less issues (actually none!)  and a new form that I can use either in a combo or a head without changing anything.  That’s a bonus!!  It really helped me refine what I do and is helping me move toward being able to produce these much quicker and with more repeatable results.

PS Head ChassisInterior shot    This project has been a real learning process and although, it’s been alot of work, it’s helping me to get a “process” together so I can have a chance at being able to build more per month than a single amp.  It’s also been the spark to get this thing called Miller Ampwerks into a business and not just a hobby.  Great hobby, but the point was actually growing it to a point that I might be able to support myself doing something I’m passionate about.  Not just slogging thru my day, enduring a J.O.B.  until at some point I keel over.

Back to the amp…. So this is my new circuit, called the Pine Street, which is a low powered simple amp that harkens back to the low watt amps of my youth, that one might have found in a garage or den back in the 70’s.  Yes people actually had dens back then, if you were real lucky your family might have even had a Rumpus Room with a tacky Naugahyde covered bar in the corner too.  But unlike the small wattage amps back then which were great for rockingout in your bedroom, you would never dream of using it on the bandstand.  Not loud enough, would cut at all and they usually sounded pretty crappy, but they did usually have that modern effect of Tremolo!! 

Staying with that theme, the Pine Street puts out a respectable 22-24 watts, which is perfect for most situations in this modern hipster indie world.  I mean no real need for a 100 watt “Can you please turn it DOWN!” stack.  Also in keeping with the less is more Ethos, is volume, a single tone control, and TREMOLO!!  After a lot of circuit tweaking and teeth gnashing and swapping of parts to get it just right, I finally felt it was ready for Prime Time.  If you’ve had the pleasure to play an old Brown Tolex Fender Deluxe, you’ll have a general idea of the basis for this circuit.  But the similarity ends there.  This amp actually has some clean volume, more range in the tone control and a bigger and badder trem circuit, along with more flexibility in the inputs.

Pine Street combo stack

Here’s what they normally look like.  Blue tolex with silver grill, modelled somewhat after the old Supro amps.  I’ve always loved that look and wanted to do my take on it.  I searched high and low for the Robin’s Egg blue tolex that Supro originally used, but no one makes it anymore, Shame…   Anyway, here is a link to a video demo of the amp done by the fine folks at The Guitar Store up in Seattle, until next time Enjoy!

Klemt Update!!!

•September 14, 2012 • Leave a Comment

Well, I must say, I’m very happy with the way the Klemt BS40 turned out.  It actually didn’t need much, other than the filter caps replaced and a few adjustments here and there.

I got rid of the rotting and oozing can cap, and replaced it with a JJ 32x32uf cap.  This is very much like what the amp originally looked like and is about  the same amount of filtering.  I didn’t want to go crazy with it.  I wanted it to sound and feel like it did originally,.  That’s always a toss up, “How Much filtering do I use?”  The tendency is to add alot more, but the results aren’t always better.  More filtering adds better bass response and often makes the power supply quieter, along with a faster/tighter response.  This is were the term “Stiff” comes into play, as with too much filtering, there’s less sag, sometimes making an amp too punchy.  The beauty of vintage amps was the electrical response to transients, giving in a little when you hit a big chord and compressing slightly.  All of that is a matter of taste, so I’m always treading the line of making the amp more responsive, while not going crazy with it, and losing the organic nature of a well designed tube amp.  It should be a joy to play, and respond to your pick attack with just the right amount of punch and just a little sag.

I don’t have an electrical background, so while what I’m trying to get across has a technical explanation, I’m trying to get across the nature of the sound.

New 1500 ohm 2 watt screen resistors mounted on the sockets.

One of the other housekeeping tasks was to install 2 watt screen resistors on the output tube sockets.  Normally, with an EL34 amp, I would use a 1k @ 5 watter there, but as this had little 1K 1/2 watters.  So I felt ok installing a beefy 2 watt 1.5K MO in it’s place.   I must say, this is one of the nicest sounding vintage amps I’ve had the pleasure of working on.  It doesn’t get super nasty, but is  more clean and punchy.  It has a real nice chime to it, clean tones sound wonderful and 3D.  Dimed, it breaks up nicely and gets real gainy if you crank the Presence control.  Speaking of which, the presence is almost more of a NFB control, than the traditional Presence Treble boost.  Roll it up and the volume increases a fair amount and it gets BRIGHT!.
Another thing that I played with was different settings of the voltage selector.  Unlike most amps from the UK, that have 110v/200v or 220v settings.  The Klemt has 110v/130v/200v/220v, making it possible to dial in for your own particular amount of wall juice.  I have anywhere from 118v-123v at my wall, so running at 10 gave me a heater of 5.7volts and a nice B+ of 424v.  At 130, the heaters are at 6.7v and the B+ jumped up to 480v, which is alittle higher than I normally like.  But after a resistor tweak, I had plenty of adjustment on the bias pot for either setting.  Also very forward thinking for the time, this circuit has an over all bias voltage pot and a balance between the two output tubes, along with 1 ohm resistors on the cathodes, making adjusting bias a snap.  Thanks Klemt!!  Anyway, I hope everyone enjoyed this little vintage ride as much as I did, maybe I’ll get some clips of it up before it goes home.

Thanks – Peace!

Bring me your tired and huddled masses, your forlorn and neglected chassis…..

•August 20, 2012 • 3 Comments


Image

    I’ve been away for far to long and would like to get caught up a bit.  I thought it was time to layout some of the unusual amps to grace my humble workbench in the last year.  I have to acknowledge my main Benefactor, from whom almost all of these Beauties have come from.  They’ve been abused to varying degrees and most often just needed some TLC and some cleaning up.  The power supplies are the hardest hit, with oozing filter caps and rotted B+ wires.  Then comes the head scratching part.  I almost always find dubious repairs or mods done by folks with widely different levels of skill and or knowledge about things electric.  Which usually sends me back to consult the Google for any existing photo documentation about how it was supposed to look like.


   The amp above is  currently gracing my bench, and I must say is probably the rarest thing I’ve seen yet.  The beautiful 50’s Hi-Fi inspired Klemt BS40 head.  I don’t know a lot about the Klemt amps, except that they made a series of amps and echo units from the late 50’s to early 70’s?  Everything I’ve seen has wonderful vintage vibed sheet metal and appointments that would have been right in place with your Dad’s (scratch that)  your Grand Dad’s Fisher Stereo gear from the 50’s.  They also apparently beat Marshall to the punch by producing a Bassman copy some time before Marshall came out with the famous JTM45.  I can’t wait to get this thing cleaned up and safely back in working order.


Image

Next up, another rare European offering, the Carlsbro PA60R.  A 4 channel, 60 watt PA head with the most awesome reverb I’ve heard this side of Fender’s infamous stand alone reverb unit.  This thing will Surf!!!  Plus it’s loud and clean, leaning more towards Hiwatt than Marshall.  They were produced in the UK thru the 60’s and 70’s, following Rock’s classic hey days.  They still produce gear today, but not quite like these early offerings.

ImageI’m sorry that I don’t seem to have a picture of the outside, but I like the insides as much so here you go.  The main problem with this one (and there were a few) was that during previous repairs, some of the traces on the underside of the circuit board had come apart or lifted and there were numerous globbs of wire and solder to try and bypass the loose traces.  This required a bunch of clean up work to make them stronger and more stable as well as prettier (that’s tech jargon).  Anyway, it’s a real beauty and sounds fantastic and different from all the Marshall Wanna Be’s.


Image

Image

This was another seldom seen offering from Epiphone, The Mighty Futura (otherwise known as the Gibson GA30RVT Invader).  It had four 10″ speakers, reverb and tremolo and used 7581’s and 6EU7’s, for about 30 watts of vintage tone.  I actually kind of liked this one, for exactly that.  It wasn’t very loud, and the reverb sounded like ass, but had a nice swampy trem circuit and really browned out when the trem & reverb were running.  It’s major claim to fame was that it was the amp that Mike Bloomfield was playing when he was breaking big.  To that end, it was interesting to find the original receipt inside, along with a torn out page from a Guitar Player mag showing Mr Bloomfield playing it. Cool!   This one was a workout however, and I was surprised it hadn’t caught fire yet (really).  There were some questionable rewiring of the mains power switch, which was done on a 4 level multi position wafer switch.  No wonder it had a horrible power supply hum!!   After completely rewiring that to eliminate the AC switching and ground cap polarity flip, and replacing all the filter caps (including getting rid of one of the infamous Gibson Party Hats), and various other leaky coupling caps and a shorted out reverb transformer and a mystery voltage arc on the trem tube socket and…….  It sounds really nice now.

Image

Here’s one you don’t see everyday, Thankfully!  It’s a Fenler Deluxe Reverb.  What?  One more time for the hard of hearing, A FENLER!

Image

   This was a laugh riot.  Got it operating safely with an absolute minimum of time and sent it packing.  I think these were made in the Japan during the war to sell to GI’s stationed in the Philippines.  Oh Nostalgia!,  it’s just like home here.  Anyway, it was dirty and stinky and had mouse poop and sounded like crap.  It’s hard to imagine that anyone would mistake it for a real Deluxe Reverb.  Well, I need to wrap up this first instalment.  I will be back shortly with more Tales from the Crypt.  Stay tuned……

Rise of the Reptile

•September 25, 2011 • Leave a Comment

There’s one in every crowd, I think.  There’s always that one person that just has to have something different.  Not long ago, I spruced up a Marshall JCM800  head for a customer, and it revived the sonics considerably.  When he came to pick it up, he mentioned that he would like to get it recovered, and did I do that sort of thing.  At first, I kind of demurred and kind of deflected the request.  Actually, I didn’t want to mess with it.  Tolex is not my favorite part of building, in fact it’s probably the first thing I would farm out given half a chance.  However, he persisted and I relented.  Part of my attempt to dissuade him was that he wanted it in Snakeskin.  Now I like my Rock just as much as the next guy, but I have never been a animal-hide type of person, and especially not a reptile fan.  So the thought of doing a Marshall head in faux snake skin was a little too Spinal Tap for me, (he actually wanted the “SpinalTap” – goes to eleven faceplate too!).  Now I couldn’t source the faceplate, but I could get my hands on the snake (er the tolex).

I was also worried that it would be so outrageous, that he would come back for it and stand there slack-jawed, pointing his finger and stammering.  “What have you done to my amp?”  I had visions of the Titanic in my mind, or the Bismark or the Lusitania, you fill in your favorite wreck here…  But, in the end, I relented and set about measuring and ordering the material.

Now, doing a later model JCM head requires one continuous piece of material as there is only one seam.  so even though the stuff comes on a 54″ wide roll, I would need to order 3 full yards to get enough to wrap.

I can’t begin to tell you what was going thru my head upon unrolling this bundle and spreading it out on the living room floor.  “Honey come quick…I’ve decided to redecorate.”  It was so overwhelming at first, kind of like stepping out of a dark cave into the sunlight and being blinded by the light and having to pause with hands over my eyes to allow my pupils to adjust.  It was that kind of sensation.  After my eyes became accustomed to the enormity of reptile on the floor, I set about to get the best pattern to show on the finished project.  Fortunately, I didn’t have to waste too much to get a cool pattern for the head.  I began my task in earnest.  I had already stripped the box of the old tolex and sanded it clean. The removal process actually went real smooth.  The old vinyl came off easily with the help of my trusty heat gun and getting the old glue off was as slick.  I just put some #100 grit in my finish sander and had at it.  Unlike paint that gums everything up, the glue just balled up underneath and I would stop every so often and brush it off with my hand, the sandpaper stayed clean  the whole time.

Naked Marshall head box


With each side completed, I got more excited and as every corner got nipped & tucked into place, I could see that the finished product would be very special.  Even my wonderful wife, who humors me, thought it was quite attractive.  At least that’s what she said,  as she slowly walked the long walk back upstairs shaking her head.

Now would be a good time to do an advertisement for a new tolex glue that I tried for the first time.

“How many times has this happened to you?  Just as you start to glue your favorite vinyl down, your overcome by the smelly fumes.   The two pieces won’t stick and you spend hours rubbing and scrubbing only to have it all fall apart?  Well wait no more!  Try the new and improved Tolex Adhesive”  I thought I’d try a glue that’s supposed to be specifically for tolex and hopefully never have to use contact cement ever again.  CE Distribuiton sell it, also Mojotone sells what I think is the same thing.  Just a generic looking white plastic bottle called tolex glue.  Let me tell you, this stuff is the bomb-diggity.  One even coat of glue on both surfaces, wait 20 minutes, affix the two pieces and yer done.  No having to re-glue all the edges, cause they came apart, virtually no fumes and it’s done.  It worked great and was so easy compared to all the different versions of Weldwood Contact cement I’ve tried, it was nothing short of amazing.

If you have to glue tolex, do yourself a favor and get some, you will not regret it!   One final note would be next time, I will get a package of new brass rivets and not try to re use the old ones.  First of all, they are a b*^@$h to get out, and then I had to reshape them and carefully either press them with a clamp or re drill and hammer them back in.  Now matter how careful I was, they would start to drift off crooked as I hammered and it was just a pain.

Do yourself a favor and get new ones, they are not that much and it will save a lot of grief!!

Before...

One more thought before you go… You might be wondering,  “What are you going to do with all the rest of that material??”  Well, turns out the happy customer also wants the 1960TV “Tall” cabinet to get covered to match.  Then he will have a veritable wall of snake skin.  I can’t wait.  Oh, and one other thing.  When the owner came down to my shop and I unveiled the amp, he stood there exclaiming and swearing (literally) that it was without a doubt the coolest thing he’d ever seen.  My work here is done!

After

Now you’ve done it!!

•July 3, 2011 • Leave a Comment

Looks alright

Well, I’ve been threatening to do this for a long while and I never had the right equipment.  But since my Franken-Baby is done and ready to be delivered, I had to make an attempt no matter how sucky it might turn out.  Actually, it doesn’t suck (too bad) at least.  I used our trusty little Nikon CoolPix camera and recorded a video clip using the on board mic.  that was the reason I thought it was gonna be terrible, but it came out pretty good other than the hiss/background noise is a bit exagerated, at least the mic wasn’t overloaded and distorted.  So without further ado, may I present the “ShowMaster”. . . . . . . . .

Well, without paying for the video upgrade, you’ll have to go to You tube to see it, here’s the link:  (actually it did show up here – cool!)

I’m pretty happy overall with how the amp turned out.  I like the solid sound of the Thick channel, it doesn’t get real gainy or saturated like cascading stages does, but has a lot of authority and is quieter.  I paralleled the first preamp tube, then used a 1uf cathode bypass to tilt the response up.  I originally had a 25uf cap in there, but I felt the bottom was too big.   I mean some people like big bottoms, and while I’m a fan, this needed to be a little sportier. Now as the clip shows, when you dime it, it has that Marshall grind, but never falls apart.  For the tone stack bypass, the switch adds a 750pf cap across the treble cap, which allows more upper mids and a little gain boost.  Nothing too dramatic.  As I say in the video, it adds a little chunk- that’s a technical term meaning an upper mid boost with a little bite.   Also the venerable LaMar Post PI master volume,(as detailed in the forum over at Metropolis amps), was added afterwards at the request of it’s chomping at the bit new owner.  I had to move a few things from where I originally had them to get it in there.  If your frustrated with traditional master circuits, you owe it to your self to try this one.  It’s a refinement of a Ken Fisher design, that keeps the sound of the pre-power relationship intact.  Most masters shut down the per amp signal and the PI/power section doesn’t get hit the same way and you lose all that juicy power amp distortion.

A few other technical details, since I was going to use 6V6’s, I bumped up the screen resistors to 5k@5watts, to protect them from meltdown.  Especially since I’m running a Twin power transformer and it’s putting out 445-450 volts on the plates.  There are a few modern tubes that will handle that much voltage, namely the JJ’s and the new Electro Harmonix 6V6.  While they probably deviate a bit from a traditional 6V6 ala RCA or Sylvania, they have their own unique sound and won’t fold up and die – and you can still get them!

Four Little Piggies All in A Row

The thing I haven’t really talked about is the Vibrato channel, which has that nice sweet Fender Bandmaster sound.  The only issue I’ve run into is that the tremolo isn’t throbby enough for my liking.  All the parts are new, all the voltages are in the ball park and it has a new LDR opto-bug, but it doesn’t start to show up till the Intensity knob is at “10” and then it still is too polite.  I’m not sure if a different roach would make a difference or not.  I’ve heard talk that the modern reproduction LDR’s are spotty as to performance.  Had I a bit more time I would redo that circuit without the roach.  Because it seems to me that the amps I’ve worked on recently that had vibrato/tremolo (ie. VoxAC100, Multivox 45) all had stronger. nicer sounding circuits.  Oh Well!

So, after this weekend, one of the things I’m going to have to get dialed in is doing videos.  Oh Great, you mean I have to figure out a new time-wasting activity?  Anyway, I’ve put it off for long enough and can’t ignore it anymore.  Lights, Camera, Action!!  . . . . . cut, cut, you’re doing it all wrong.

Try it again and this time with feeeeeeling.

I probably should have made two vents on the back panel, but considering the old one had none, it's all right.

With a sound so tough, you need a crome knob to handle it!

Full Frontal

This is the Real Fuzz Factory

•June 18, 2011 • 2 Comments

   This is what I’ve building the last couple days, variations of the Torn’s Peaker and Soda Miser.  There was actually a few boxes of TP’s on the stand a few minutes earlier, but they got moved.  It’s been real nice getting a chance to build for someone else, it’s given me a different view on design and construction aesthetics.  plus it’s made me  more consistent about certain things.  Not that I’m sloppy by a long shot, but everyone has a different view about what they want things to look like, and my way ain’t the only way.

http://www.deviever.com/fx/

I really like this particular graphic!!

This was last weeks output:  Disaster Fuzz, Bit-Legend of Fuzz, Electric Brown (nice OD with a fuzzy edge) and the ungodly Noise Floor.

“And the Stone just keeps on rollin….”

•June 18, 2011 • Leave a Comment

Of course the astute music lover would recognize the line from Robin Trower’s “Too Rollin Stoned”, but this time around there is no more bad news.  Just got a message from my good friend James Schultz from up north, about a recent blurb about his new shop, The Guitar Store.

http://www.mygreenlake.com/2011/06/the-guitar-store-seattle/

My first two amps on the floor ready to be played

In it, I was mentioned (Thank You very much) along with a very interesting mis-spell of my amp name.  The writer referred to them as Miller Ampwrecks, which is either a very good omen or a lawsuit in the making for trademark infringement. I don’t know if the person who wrote the blog is a guitar player himself and knows about the mythic “Train Wreck” amps or just got all dyslexic on the funny Germanic flavored AmpWerks.  Either way it’s a great compliment and a good omen!  It’s also a funny coincidence, as my original concept about starting this project was inspired by the Ken Fischer story.

When I was first told about the mix-up, the  first thing said was, “Well you know, you might want to run with it..”  As tempting as it maybe, I really want to be known form my own thing and not try and get in the slipstream of another famous builder.  Aren’t your amps just like?……   No they are not like anything but themselves thank you!  Actually, that’s not true as most amps are built using tried and true circuit designs that have been around for a long time.  I think the difference really comes from how those elements are implemented and of course part selection does play a role.  I’m not going to get into the wire is wire or all caps are the same electronically, so …put that in your pipe and smoke arguments.  Because it does get taken to extremes.  I remember delving into the world of Audiophillia, back in the 80’s and while I was eager to try the latest mod to eek out the last drop of performance out of my gear.  I really was bemused by the lengths that some marketing folks were taking to try to describe and then sell magic ebony blocks to set ones equipment on that would not only clean the aura of your linestage, but give you good karma as well as fabulous sound.  I’m not trying to throw egg in anyones face, but I think it got a little crazy there for a while.  But what the hey, if someone wants to throw tens of thousands of dollars into single-strand molecularly pure silver conductor cable, who am I to stop them.  as long as they aren’t endangering their family or raping the rain forest to do it, knock yourself out.

Wow, what I really meant to say was the proper part choice can make a difference, and the more simple the circuit, the more of a difference you’ll hear.  I think?  I do know that there are caps that I don’t think  belong in a guitar amp, but then again, it depends on the desired result.  If you want straight wire with gain, then maybe some of the “audiophile” approved film caps will get your panties hot.  I personally like oil-in-paper (OIP) or older style polyester film.  They just seem to sound more natural and smooth to my ear.

These are just a few of my current favorites, not because I think they have some inherent MOJO, but because they sound right in my amps, Period!  Now, I have to say I haven’t tried some of the more expensive Paper caps like the Jensen’s or Alessandro’s, and they may be just that much better.  But until I get someone who doesn’t mind spending $17-$20/ coupling cap (of which there is 6-8 of in my amps) I’m not going to experiment on my dime.  That is to say unless a large bundle of C-Notes drops out of the sky and all the other bills are payed and the credit card(s) are payed off and my emergency fund is flush, I’m not probably going to spring for them.


So once again gentle reader, I’ve/ we’ve ended at a place far from the original starting point.  I hope it was fairly painless, and somewhat enjoyable.  I know that often I’ll lay awake pondering what to do with the stuff that I build.  It’s most likely a condition for which there is no cure, because even as maddening as it gets some times (just ask my wife);  I can’t imagine life that was sure and without wonder and the excitement of some discovery that wasn’t planned on, or the look on someones face when they plug in and hit a cord and just start grinning with that stupid blissed out-out Homeresqe grin and I know I’ve done something right after all.

Good Night, Pleasant Dreams…………….


Resurection Device

•June 15, 2011 • 2 Comments

Well, it’s finally coming together.  I know I’ve been away for awhile, the usual stuff…..life!

Actually, I was building up a couple amps to take up with me for the Greater Seattle Vintage Guitar Show last month.  Did I get everything done, NO!  Did my cards get printed,  NO!  All the glossy promo sheets I had planned, well they sort of got finished ….the morning I was leaving for Seattle.  I really was feeling overwhelmed with all the little stuff that was going to make or break my trip, and the anxiety over not having them all done.  But I decided it would be okay to just go get my face out and not fret the little stuff.  I wanted very badly to look professional, like I really belonged.  Not some joker who built a couple amps in his basement trying to compete with the other “much more professional” boutique guys.  Performance anxiety, you bet.  But I needn’t have worried, because I was graciously received and warmly welcomed.  My amps got an overwhelming positive response from other builders, players and the store owner, whose good graces allowed me the be there in the first place.

So, the word I kept hearing from everyone who played through it or was within ear shot was that this amp had a “unique, 3-dimensional quality”.  I don’t know how “unique” it is , but I think it sounds good, but then again, I built it and am far from impartial.  Anyway, that term kept coming up from one person after another.  People where pretty blown away, which of course makes me feel good, “Gee, you really like me”.  But to me, the proof of the pudding is in who coughs up the dough.

So, since this is a very condensed version of the events and not meant to be a complete, detailed look at the weekend; here is the crux of the bisquit.  I got a call from one of the attendees to build him an amp.  That”s what I’m talkin ’bout!

So……now that I said all that, the focus of this entry was one of the amps that I wasn’t able to finish.  The lonely Bandmaster that almost wasn’t.  In the entry titled “The Evil That Men Do”, I detailed the inhuman treatment meted out to that poor amplifier. Now I can proudly show off where little Johnny has gotten to.

The old, tired abused chassis, with the butchered transformers, bent sheet and hacked wiring.  I salvaged some of the coupling caps and controls, and pretty much tossed everything else.

May I present the new and improved “Show Master”!  I designed and built all new glass boards circuits, keeping the Vibrato channel stock Fender.  The Normal channel is now called “Thick” as it is a paralleled first stage into a cathode follower tone stack, ala Marshall JTM.  It is defientaly thick and sounds great cranked with humbuckers into my 2×12″ cabinet.

One of the other peculiar things about this amp was that someone had mounted a Twin/Showman set of transformers in it.  I was able to trade off the output and choke for a gentleman building a “Dumble” clone and in exchange got a nice ClassicTone Magnetics JTM output transformer and choke.  The idea was that since the chassi was punched for four outputs, a JTM OT at 3200 ohms is perfect for 2 pairs of 6V6’s .

  The other issue that was going to need to be addressed was the butchered faceplate with extra holes and everything.  So with the help of Sandy at Precision Designs of Indiana, I had a new control panel crafted to reflect the changes in layout and the new moniker.  The cabinet also has received a face-lift with the tolex getting repaired and new gold grill cloth for the fascia board.

Most will get this one, but "Show" from the Showman iron & 4 output tubes and "Master" from it's humble beginnings as a Bandmaster.

All in all, this has turned out wonderful and while not back to stock condition, I think it’s better and unique in a tastefully done way.  Most people only use one of the channels anyway, so why not beef up the Normal channel and have two useful tones to choose from.  Plus it’s still in the 40-45 watt range as it was originally, but with a grittier tone from the 6V6’s.  This one is for sale by the way, I can’t keep all the strays that come thru here.  At least that what I keep telling my wife.

  That’s all I have time for right now.  Thanks to all who drop by and keep on Rockin!

A funny thing happend on the way home….

•March 27, 2011 • Leave a Comment
The delicious crunchable joy that is Devi Ever US Fuzz

I was purusing Craig’s List one evening, doing my due diligence as far as job hunting goes, and came across a heading that caught my eye.  “Effects Pedal Assembler Needed” – HHHhhhmmmm, now what are the chances that I could find a music biz related job in this God forsaken little corner of the globe we call Stumptown?  I mean arent’ all “those kinds” of places down in SoCal or Nashville or New York City?  So, I open the liting and sure enough, local boutique builder in need of detail oriented, experienced builder needed to help catch up the backlog.  Wow, I didn’t see that coming!  So after a couple emails and a few photos of my work later, I had a handful of fuzz pedals on my bench for a try-out.  Cool, finally some interesting serendipity has happened to me and not someone else.   I mean how many times have you heard, “Oh, So & So got a gig working with ______ ”  or ” I found it at Goodwill” or “It was in the dumpster”  Those things usually happen to somebody else.  After returning them at the predetermined time and being inspected, the creator of  Devi Ever Effects said “Welcome Aboard”.

    This has been what I’ve been doing for the last couple weeks, almost non-stop.  Huffing solder fumes and coming out of the basement for lunch, bathroom break and up to bed at 2am.  I definetly need to rig up some venting over my workbench so I don’t poison myself.  I mean I made it to “50” this week, I’d kind of like to make it to a much later date, God willing.  So even though I’m using lead-free solder, I like a higher percentage of Oxygen in my breathing mix.

If she ever switches to SMD's I'm out a here

Wow, I started this weeks ago and have just been swamped, so it has not been completed yet.  Until now……Since I started writing this post, I’ve made two batches of Hyperion’s, Eyes of God, Disaster Fuzz’s, Torn’s Peaker,  Dark Boost, 2 batches of Shoe Gazer’s and I just finished up a clutch of Rockets.  Phewww!  My wife is starting to complain that I don’t ever come out of the basement.  Well, she used to say your always at work and I never see you, at least I’m home now, if she needs to see me, she can just holler.  I’m enjoying building these little beasts, but I’m glad I don’t do them 8 hrs a day.  It does take a toll on my hands and wrists, much like the repetitive motions at my old job did.  But it’s nice that I can work a 3+ hours a day (any time of the day or night) and have them done in 3-4 days.  Leaving me plenty of time, (well some time) to rehearse, build amps and do repairs.
  It’s been interesting switching gears as to scale and working on these little critters.  I’m getting much faster at it and am honing my pedal building skills for sure.  All in all, I think I’ve built maybe 115-120 pedals of different sorts and Devi has been very cool to work with.  If your effect needs run to the more extreme, you should really check out her pedals.  Some border on….., hell who am I kidding, some of these pedals are completely unhinged.  Now if I can get a chance to build with Maleko, I’ll be super stoked.  I really dig his stuff as well.  Plus he now is located in Portland, so it’s becoming boutique central around here.
Peace Be With you!

Mod Update

•March 5, 2011 • 1 Comment

Now for the things that they don’t tell you about!

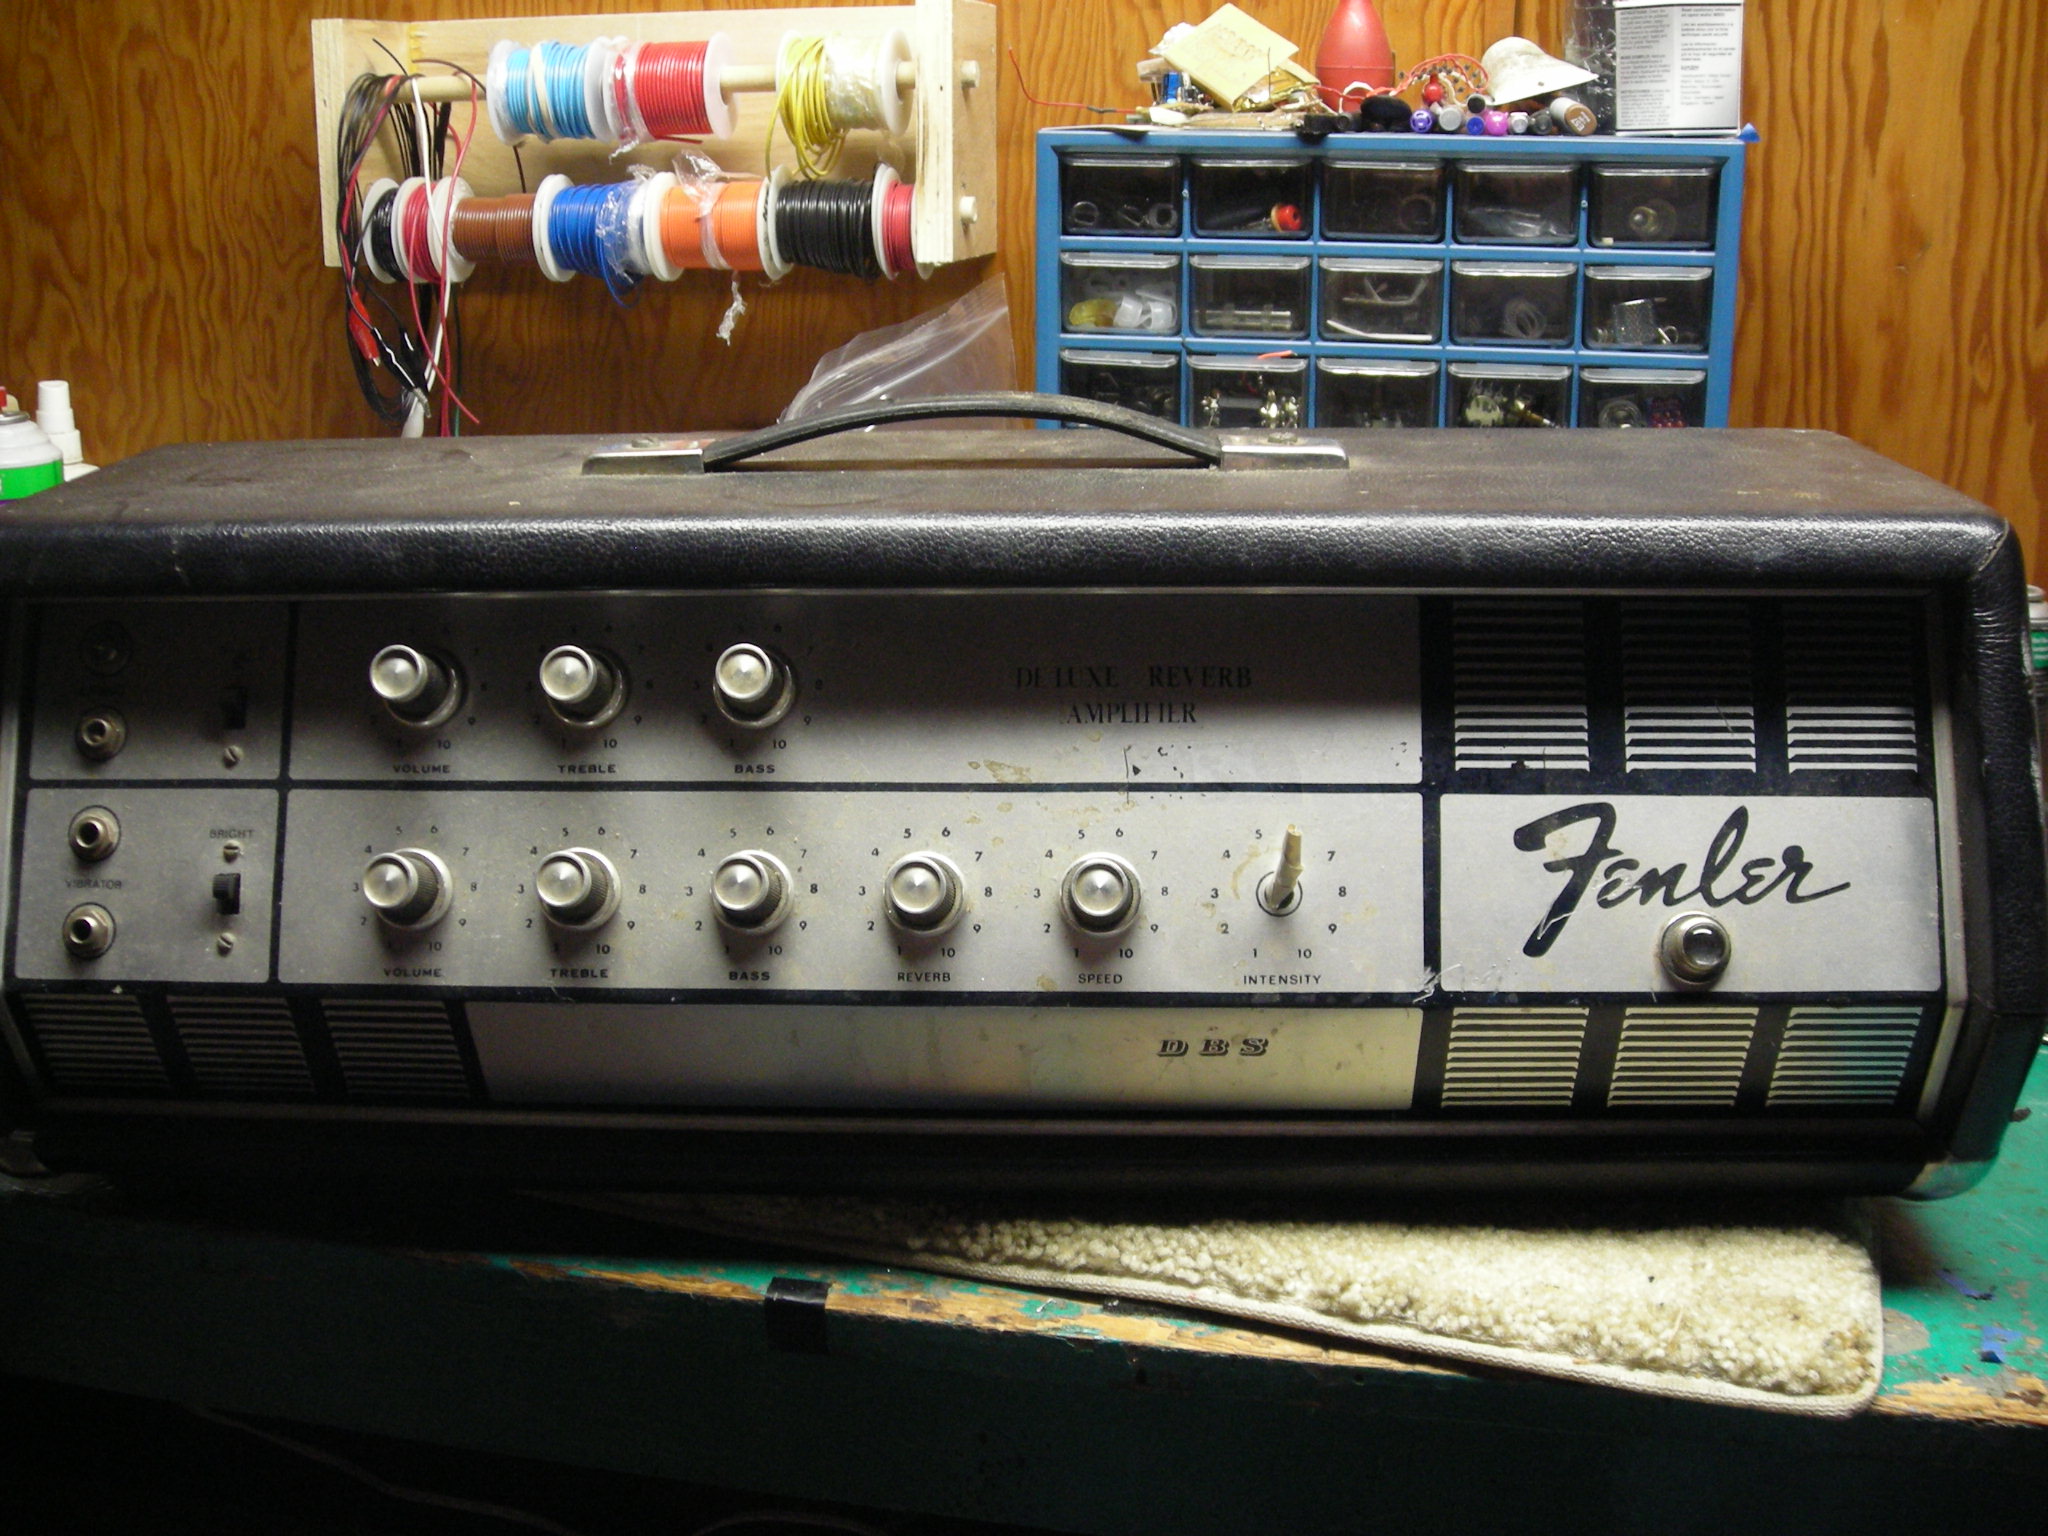
After having completed this set of mods to a customers amp a chain of events happened that has reshaped my thoughts about doing mods in the future. 

1)  Under-Promise and Over Deliver – thinking that these mods would be a slam-dunk easy upgrade for said customer, has tempered my enthusiasm some what.  There turned out to be a string of unintended consequences fueled by the beast itself (inexpensive pc board amp in a little tiny cabinet).  First of all the act of removing the pc board loosened  (I think) the solder joints on the ribbon cable supplying  the grid/plate/cathode of the preamp stage, creating a horrible oscillation that appeared at the extremes of the volume and tone control rotation.  It also had a underlying sizzle at all volumes, that never really went away.  Now this was a used amp that I have no idea how many times it might have been opened up, and while nothing looked obvious, the effect was very noticeable and wasn’t caught by me, since I typically never run an amp with all the controls turned up.  Who would do such a thing,? 

    Also, the new tonal shift with increased bass response exacerbated all the annoying cabinet rattle issues inherent in these little amps.  Add to that the use of an aftermarket Eminence speaker that has a much greater voice coil travel than the stock speaker.  With the new found bass, the speaker would flap at will hitting a little piece of the plastic grill cloth that extended out into the cutout and turned out slightly to create a kazoo like effect as the speaker travel now brought it into contact with said cloth making a horrible buzz.  That I was blamed for because it didn’t do it before and now it does therefore it’s my fault!  I had to dissasemble the amp with a very frustrated customer looking over my shoulder, while I’m sweating bullets trying desperately to find the offending cause.  After removing the speaker and testing it out of the box and testing it with a different amp and testing the Blues Jr into a known good cabinet, the speaker was fine.  Once reinstalled and carefully retorquing the speaker down to not twist the basket, plug in and horribnle buzzing again.  That’s when I took it all apart again and had an Aha! moment  when I inspected the gasket side of the speaker and noticing very little material, so when compressed the metal rim was up against the baffle and the speaker surround was almost flush with the face of the baffle.

Eminence, if your reading this, please use a thicker speaker gasket on your Red white and Blue line.  Please?  Anyway that’s when I saw the piece of extra grill cloth sticking up and once removed with a blade and the speaker reinstalled.  No More Buzz!

2)  Test amp at all extremes whether I think someone should play it like that or not. – Playing it after the mods at medium ranges of controls didn’t reveal the parasitic oscillations, and they only became apparent when both the Volume and Treble were on 12.  Again who plays the amp like that?

3)  Don’t say Yes to people who read something on the internet – Just because everybody is doing it, doesn’t mean it will work perfectly the first time.  Remember, that peaple that are selling mod kits and instructions, don’t usually tell you about the ones that didn’t work or the ones that they had to spend a week to get it to work.  They wouldn’t sell anymore kits.  This is no jab at Bill M or his mods, it’s just that every so often, there will be that one amp that just defies description and refuses to behave.  from my reading of his website, it’s obvious that he’s done hundreds of these mods and has researched them and documented the results with a good track record.  however, general warnings aside sh#@$ can happen.  I was very careful removing the board and still a problem arose that was not appearant or obvious as to a cause.  Someone else had also replaced the input jack at some point and just wired jumpers to the board which also created problems as, each movement of those jumpers changed the degree and frequency of the offending noise.  The shorting tab was also weak, so intermittant contact led to noise sometimes – no noise others.  I had to replace that also and rewire a shielded cable across the board to the grid resistorof the first stage.  That helped, but still didn’t get rid of the oscillation.  playing with the bends in the cable, which is supposed to get rid of these problems didn’t.  Very frustrating!!  Plus, each time I thought i got it solved and sent the amp home, the customer would call me up and say it’s unplayable and you need to fix it!  Now I tested it wtih my guitar and it sounded ok, each time.  Let me qualify that, sounding ok to me includes some level of noise and bass fart out and all the other intrinsic things that go with a Blues Jr/Pro Jr, etc… so when I hear certain things, I’m thinking it’s just the normal noises in here.  Others may not be so objective and consider any noise an afront and must be remedied,  but remember, this was never meant to be the final statement in amp building.  Ok, back to the story…..I mean why would I not check it out before sending out the door.  I’m pulling my hair out, the owner is blue in the face and thinking “great, another hack repair guy”.  Nobody is happy. 

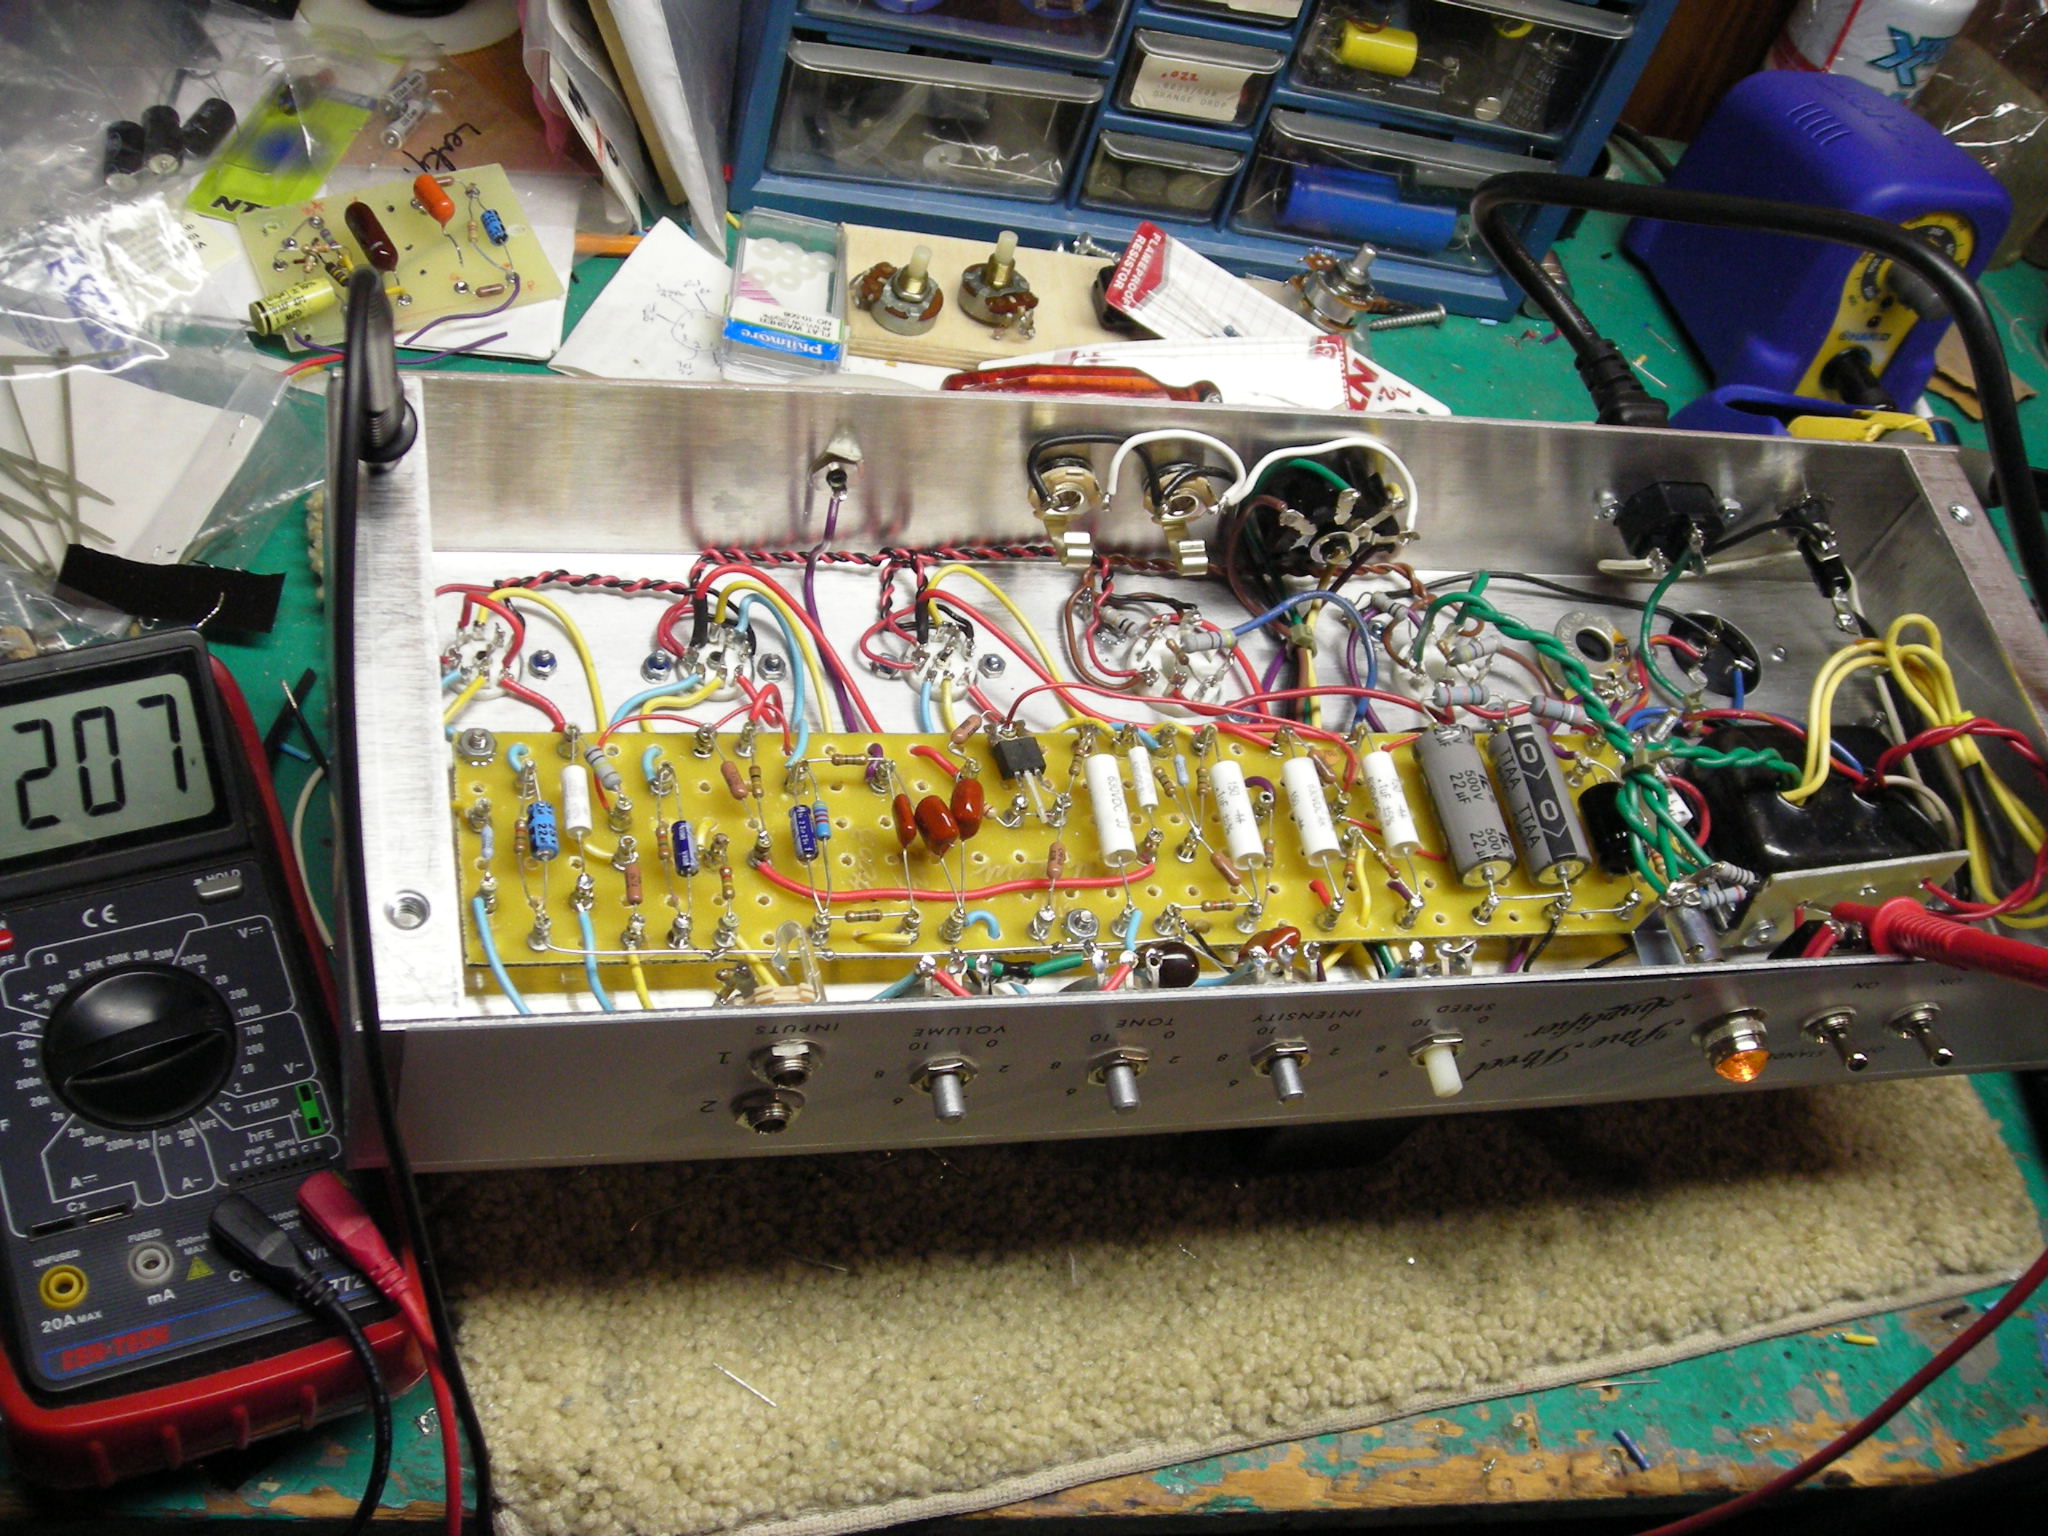
     Once back at my shop, (for the 4th time in as many days) I hooked it up to the scope and could see the hash on the screen and it centered around the first preamp stage, except, I couldn’t find any appearant source of the noise. 

    Let me just say that these noise problems were different by degree at different locations and times.  It would sound fine at one plug and awful at another.  Or in this case sounded good at my house, taken home and be terrible at the owners house,  Alright, back to the story. 

     That’s when I decided to remove the ribbon cable and reflow the solder joints.  I hate this part, because the risk of screwing up a solder trace is real high, even being real careful not to overheat them, sometimes they just come loose.  Carefully remove solder, gently slide out the ribbon, cut back a bit more plastic then reinsert the ends thru the solder pads.  Careful, careful!  Now here’s what made the difference, most ribbon connections are made with the ends just sticking straight up thru the pad then soldered.  The wire isn’t actually touching the pad it’s just held in by solder.  If they get stressed from moving them around or the amp gets jostled, these faux connections can break loose.  They look  solid, but these’s just enough of a poor connection to let parasitic noises a foothold.  I put the ends of the cable thru then bent them over to actually touch the pads then soldered them.  Success!! most of the oscillations gone.  There was still a little sizzle left, and that was ultimately cured by wrapping an adhesive strip of copper foil around the cable like a shield, then soldered with a jumper that was attached to the chassis ground point.  That got the background noise to the level of having the shielded cover installed, and when that was added, the amp was way quieter than before.

In conclusion:   If it sounds too easy beware!  Take your time and exhaust all  testing before calling the customer to tell them it’s done.  Lastly, warn all people requesting JoeBlow’s Super Duper Mods for XYZ amp that it may or may not work, I’m not responsible for you not liking the result .  In other words I need a prenup-like disclaimer for any mods.  Repairs are one thing, the amps already messed up, fixing it is easy.  Tweaking an already working amp can result in loads of frustration for everyone involved, ruining an otherwise ok amp, starting a chain reaction of uninteded consequences and may cause one to swear off doing mods altogether.

I hope I can get this one behind me,  Thanks for listening.

Matt